EnglishToday I put together for you a special big post full of
lovely ideas and tutorials for your crafty pumpkins. You’ll find easy and quick ideas to realize, some other of medium difficulty, and a little bit of “extreme” creations.
Hope they will inspire you (as they did for me!) to create and personalize not only your Halloween, but your autumn and your home too!
Painted Pumpkins

These white pumpkins are made by Brittni of the beautiful Papernstitch blog. You also find a little tutorial to realize them. I LOVE white pumpkins! And this is a classic orange pumpkin with another simple design to realize.
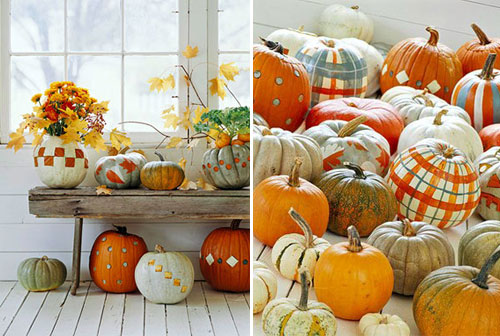
These colorful pumpkins found via A life’s design blog, can give to your home an absolutely original touch. As you can see they are all simple designs. The important thing to give a beautiful atmosphere is to pay attention to colors.
I suggest to make some tests in a support (paper, cardboard, wood…) to see how your colors look together and in the space you’re planning to position your new painted pumpkins. Other painted pumpkins here.

Another lovely idea is the Chalkboard Paint Pumpkins. Follow the link and find the tutorial to create you own chalkboard. So funny and easy!
Decorated Pumpkins
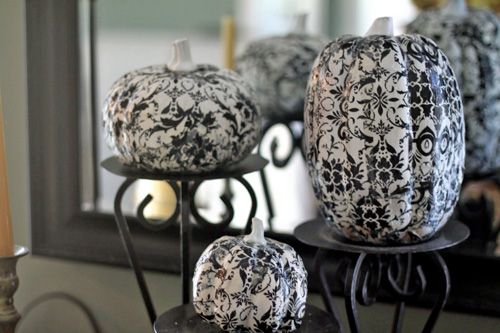
Black and white pumpkins (but you can make them using the color and design you love more!) via the The Other White House blog. The technique is pretty simple and basically is the same used for the decoupage. You can follow this little tutorial. Just imagine how many kind of paper you can use!
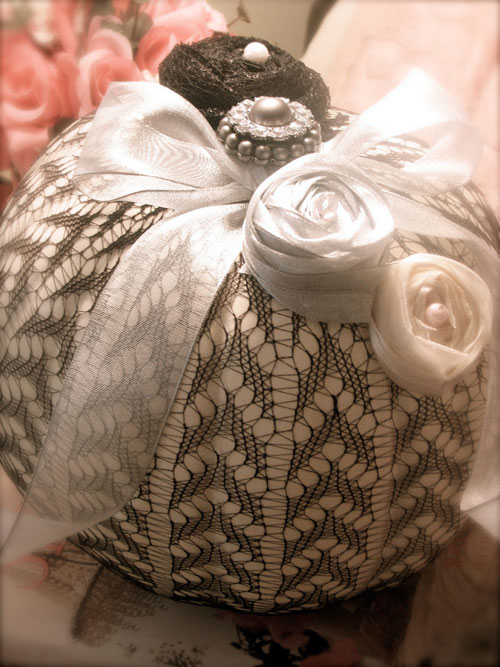
This sweet vintage-inspired pumpkin is from Shabbylaneshop blog and here’s the tutorial. So precious!
You can also decorate with flowers, seeds and everything that can be implanted or glued. Take a look at these from BHG, decorated with flowers.
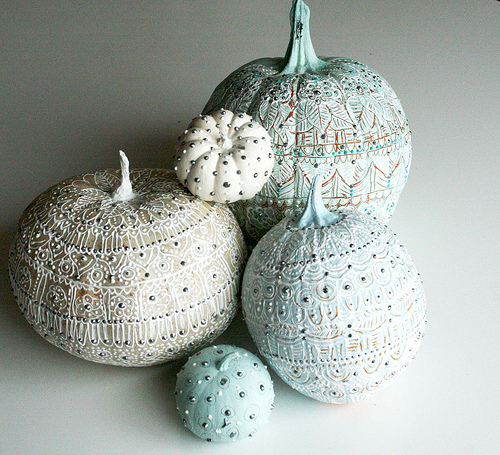
Other funny and simple decorations. These are from Alisaburke blog and here’s there is also the tutorial.
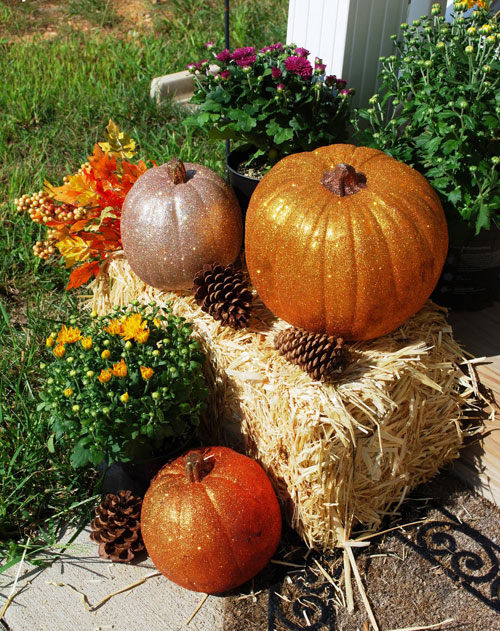
Glitter pumpkins for a sparkling effect by A Glimpse Inside blog with the easy peasy tutorial.
Create your pumpkins

Super lovely Paper Pumpkins by Wipperberry blog! And they have a beautiful tutorial too! Love love love!
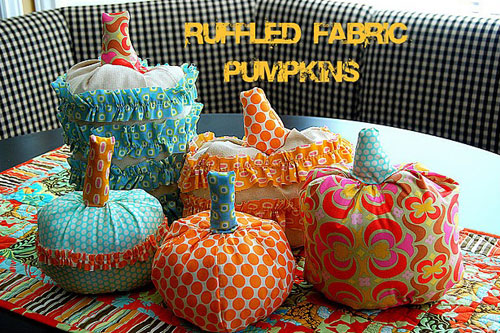
And fabrics! All the following fabric pumpkins have been created with different techniques and are all extremely customizable! These are from Tatertots and Jello blog. Watch the tutorial here.
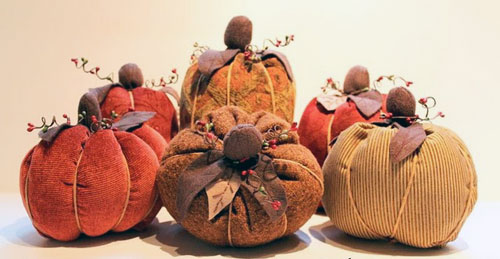
Other soft and warm pumpkins, other technique and other kind of fabrics. Here’s the Fall Fabric Pumpkin tutorial from The Cottage Home blog.

Another fabric tutorial for your pumpkins from Pinksuedeshoe blog.

A Scrappy Pumpkins tutorial by Gingercake blog. So easy to sew! Take a look!
Carved and Filigree

I heart these three carved pumpkins. The shape, the colors. They’re a work by Lockette on flickr.
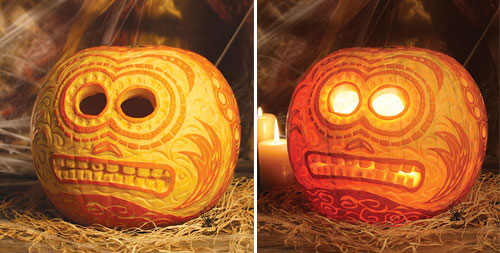
This is a funny Halloween creation by Jimbradshaw on flickr.
Note that all the pumpkins below have been created carving and creating filigree effects.
When you’ll carve creating holes the light from the inside will be a plain and intense light, while with the filigree you’ll have a transparency effect that will filtrate a less intense light. For the filigree effect you just have to scrape away the skin (the outer layer of the pumpkins). You can also adjust the depth of your carve in relation with the intensity of light you want from that specific area of your design to create a more sophisticated result.
Follow this How-To by Martha Stewart to have a better idea about these techniques.
Another useful tutorial I suggest is the 11 Tips For Carving Expressive Pumpkins.

Other examples of these beautiful techniques. To realize them I always suggest to create a template and draw the image on the pumpkin’s skin. These are from Hubpages.com. Find others here, here and here.
Extreme carving
And the last section for some really stunning works! I can’t imagine how much time (and passion!) they spent on them. Simply wonderful – and scary!

I love the Pans Labyrinth and the first of these images is from that movie. It shows how detailed can be a peeled or shaved pumpkin. Spectacular.
The second is from this page, the third with Frankenstein and the fourth with Predator are from here.
See here a work in progress photo session of pumpkin sculpting and carving.
I hope you enjoyed this post! It takes me some hours of research but I’m really happy to have found all these beautiful pumpkins and tutorials!
If you have any Crafty Pumpkin Work to share, you can do it with a link below :)
ItalianoUn post speciale fitto fitto interamente dedicato a un sacco di belle idee e tutorials per le vostre zucche artistico-artigianali. Troverete idee facili e veloci da realizzare, qualche altra di media difficoltà, e anche qualche creazione “estrema”.
Spero che vi ispirerà (come hanno fatto per me!) aanche creare e personalizzare non solo il vostro Halloween, ma il vostro autunno e la vostra casa!
Zucche Dipinte

Queste zucche bianche sono state fatte da Brittni del bellissimo blog Papernstitch. Potete anceh trovare un piccolo tutorial per realizzarle. Io AMO le zucche bianche! E questa è invece una classica zucca arancione con un’altro semplice disegno da realizzare.

Queste coloratissime zucche trovate attraverso il blog A life’s design, possono dare alla vostra casa un tocco assolutamente originale. Come potete vedere hanno tutte dei disegni molto semplici. La cosa importante, per dare una bella atmosfera, è quella di fare attenzione ai colori che si scelgono.
Suggerisco sempre di fare prima dei test su un altro supporto (carta, cartoncino, pezzi di legno…) per vedere come i vostri colori stiano tra loro e nello spazio in cui avete pensato di posizionare le vostre nuove zucche. Altre zucche dipinte le trovate qui.

Un’altra bella idea è quella delle zucche-lavagna. Seguite il link al tutorial per creare la vostra zucca-lavagna. Divertente e facile!
Zucche Decorate

Zucche in bianco e nero (ma potete farle usando i colori e i design che vi piacciono di più!) dal blog The Other White House. La tecnica è abbastanza semplice è di base è la stessa usata per il decoupage. Potete seguire questo tutorial. Immaginate quanti tipi di carta potete usare!

Questa zucca ispirata ad uno stile vintage viene dal blog Shabbylaneshop e questo è il tutorial. Preziosa!
Al posto di questi materiali, potete anche ricoprirla con fiori, semi e tutto quello che può essere impiantato o incollato su di essa. Date uno sguardo a queste dal sito BHG, decorate con i fiori.

Altre divertenti e semplici decorazioni. Queste vengono dal blog Alisaburke e qui c’è anche il tutorial.

Zucche glitterateeepr un effetto sbarluccicoso dal blog A Glimpse Inside assieme a questo facile tutorial.
Crea le tue zucche

Super adorabili zucche in carta dal blog Wipperberry! Ed hanno anche un bellissimo tutorial! Love love love!

Stoffe! Tutte le zucche di stoffa che seguono sono state create con differenti tecniche e sono tutte super personalizabili! Queste sono di Tatertots and Jello. Guarda il tutorial qui.

Altre morbide e calde zucche, altra tecnica e altro tipo di stoffe. Questo è il Fall Fabric Pumpkin tutorial dal blog The Cottage Home.

Un altro tutorial per el vostre zucche di stoffa da Pinksuedeshoe.

Uno Scrappy Pumpkins tutorial (si possono utilizzare anche avanzi di stoffa!) dal blog Gingercake. Così facile da cucire! Guardatelo!
Incisione e Filigrana

Amo queste tre zucche incise. Le forme, i colori. Sono un lavoro di Lockette in flickr.

Questa è una divertente creazione di Halloween di Jimbradshaw in flickr.
Vi faccio notare che tutte le zucche qui sotto sono state create scolpendole.
Quando scolpirete creando buchi, la luce che proviene dall’interno sarà piena e intensa, mentre la filigrana lascia un effetto di trasparenza che fa filtrare meno luce. Per l’effetto filigrana dovete solo levare via la pelle (lo strato più superficiale esterno della zucca). Potete regolare al profondità delle vostre incisioni in base all’intensità di luce che volete ottenere in qulla specifica zona del vostro disegno per creare un effetto più sofisticato.
Segui queste spiegazioni di Martha Stewart per aver eun idea più chiara di queste tecniche.
Un altro utile tutorial che suggerisco è 11 Tips For Carving Expressive Pumpkins (11 modi per scolpire zucche più espressive).

Altri esempi di queste bellissime tecniche. Per realizzarle suggerisco di creare sempre un template e disegnare l’immagine sulla pelle della zucca. Queste sono da Hubpages.com. Ne trovate altre qui, qui e qui.
Sculture estreme
E l’ultima sezione per dei lavori davvero incredibili! Non oso immaginare quanto tempo (e passione!) hanno richiesto. Semplicemente fantastici – e paurooosi!

Amo il film Il Labirinto Del Fauno e la priam di queste immagini si ispira ad esso. Mostra quanto dettagliato può essere il risultato finale di una zucca scolpita e spellata nel modo giusto. Spettacolare.
La seconda immagine è presa da questa pagina, la terza con Frankenstein e la quarta con Predator provengono da qui.
Guardate qui una sessione fotografica del processo di lavorazione, scultura e incisione di una zucca.
Spero tanto che questo post vi sia piaciuto! Mi ha preso svariate ore di ricerca ma sono davvero contenta di aver trovato tutte queste bellissime zucche e tutorial!
Se avete una vostra zucca “artigianale/artistica” da condividere, potetelasciare un link qui sotto :)
